Outline of steps to be completed:
1. Create a Gmail account and enable POP. You can use your existing Gmail account.
2. Add the SMTP Server feature to Windows Server 2008.
3. Configure SMTP settings in IIS 6.0.
4. Configure outgoing email settings in SharePoint.
Details of each step:
1. If you don’t already have a Gmail account, create one. After logging in to your account, go to the Options icon at the top right and select Mail settings. Select the Forwarding and POP/IMAP menu item. Select to “Enable POP for mail that arrives from now on”.
2. Add the SMTP Server feature to Windows Server 2008.
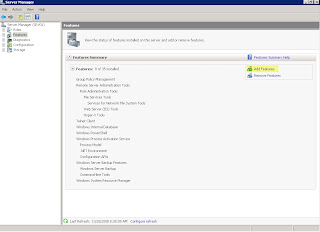
In Server Manager, select Features, and the Add Features link.
Select the SMTP Server feature and click Next.
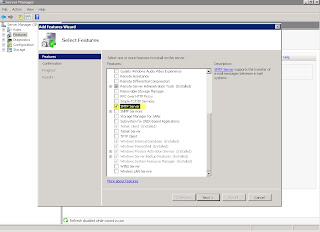
Click Install and wait until finished. Click Close when installation is complete. Exit Server Manager.
3. Configure SMTP settings in IIS 6.0.
Open IIS 6.0 Manager under Administrative Tools, Internet Information Services (IIS) 6.0 Manager.
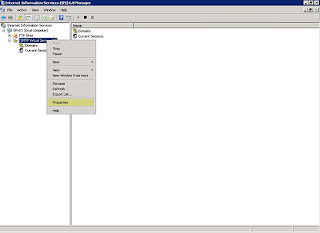
Right-click the SMTP Virtual Server instance and select Properties.
On the Access tab, select the Relay button.
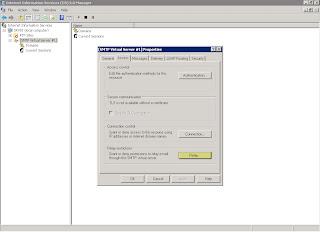
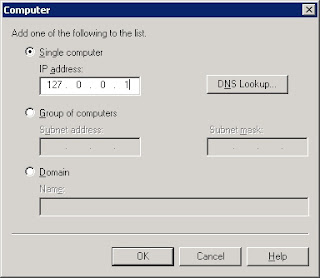
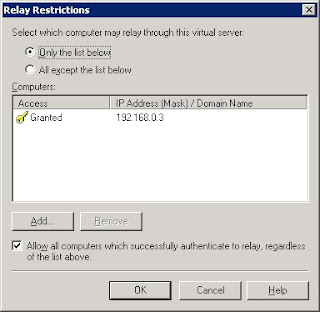
Ensure “Only the list below” is selected, and click the Add button.
Enter 127.0.0.1 for the IP address and click the DNS Lookup button. It should resolve to the IP address of the server. Select OK.
Confirm the IP address setting and select OK again.
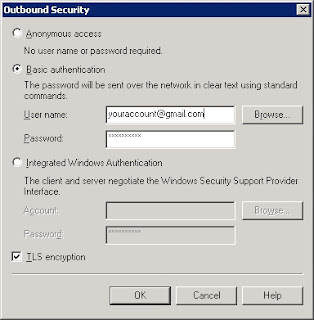
On the Delivery tab, select the Outbound Security button. Select the Basic Authentication option and enter the username and password of your Gmail account. Ensure TLS Encryption is checked. Click OK.
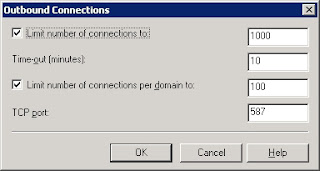
Select the Outbound connections button. Enter 587 for the TCP port and click OK.
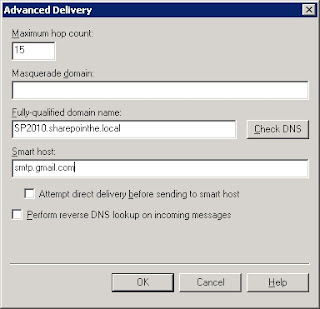
Select the Advanced button. Enter smtp.gmail.com for the smart host and click OK. Click OK again. Exit IIS 6.0 Manager.
4. Configure outgoing email settings in the SharePoint Central Administration site. Enter the IP address of the SMTP server that you just configured. It should be the same IP address as configured in IIS 6.0 above.
Your SharePoint farm should now be able to send outgoing email messages.
its works thanks.
ReplyDeleteGood tips to solve this problem of Gamil account...greatly appreciated!!
ReplyDeleteGmail Account Support
Hey really awesome post and unique content . i like it. good work keep it up . Please visit this link Windows live mail support
ReplyDelete